For years I’ve championed the use of Cloudflare wo WordPress developers and business owners. That’s never changed. What has changed is Cloudflare itself. Bigger and better every single year, but that means we need an updated guide for you to reference. Here it is, no frills, just direct settings and screenshots for how I setup Cloudflare for optimal WordPress performance.
How to install Cloudflare on WordPress
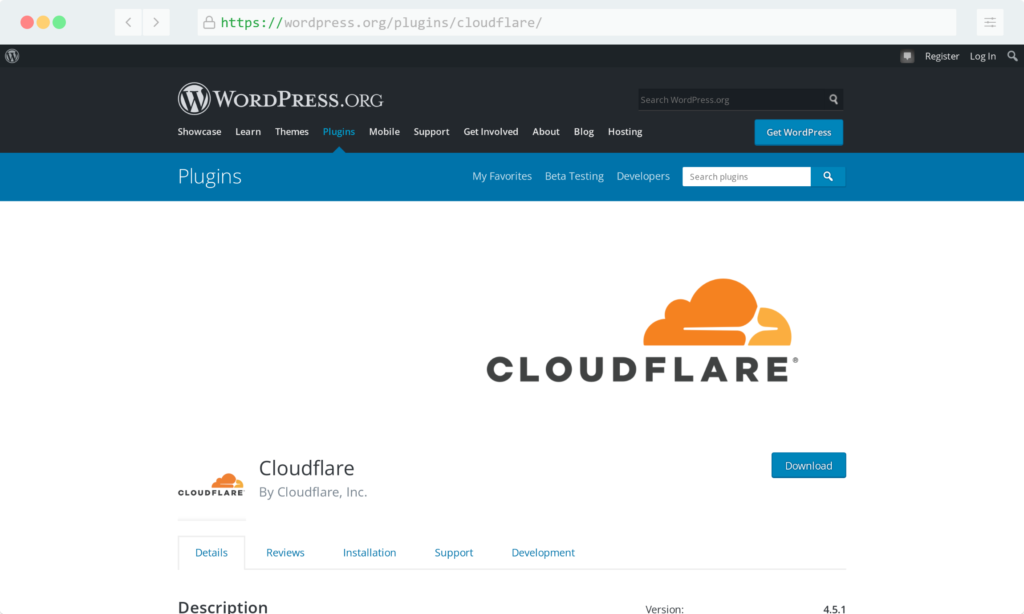
The first step is to download and activate the official Cloudflare plugin for WordPress.
Once activated, it will ask you for an email address and API key for your account. Log in to your Cloudflare account, and head over to Profile> API Tokens. From here, generate a new key under the API Token section, and choose the WordPress preset.
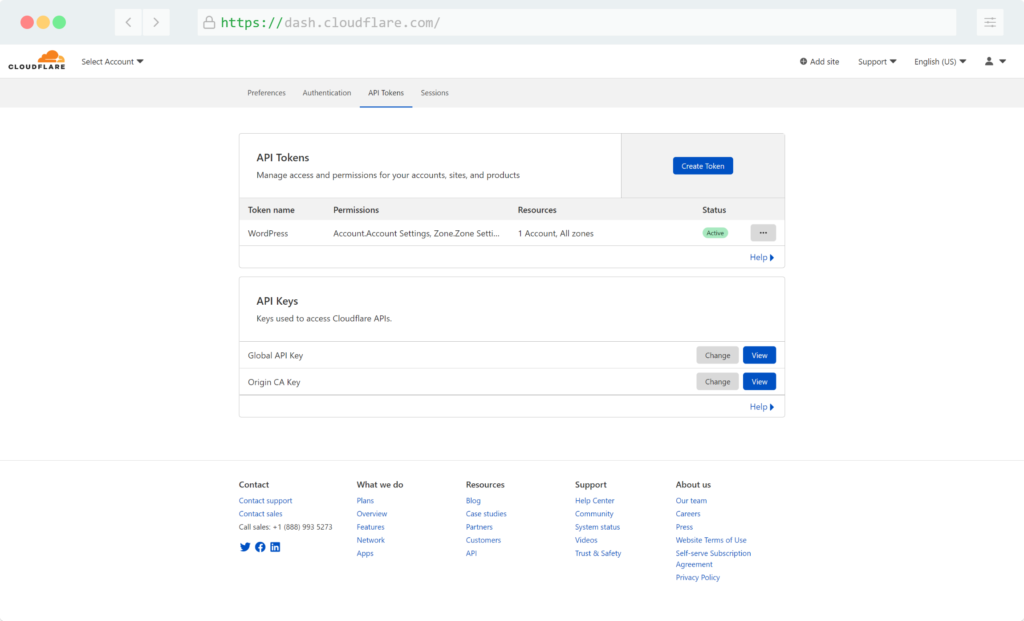
This is far safer than using your Global API key, which I believe should never be used.
Head back to your site, and in the plugin settings, enter your Cloudflare account email address and the token you just generated. You should then see the settings screen.
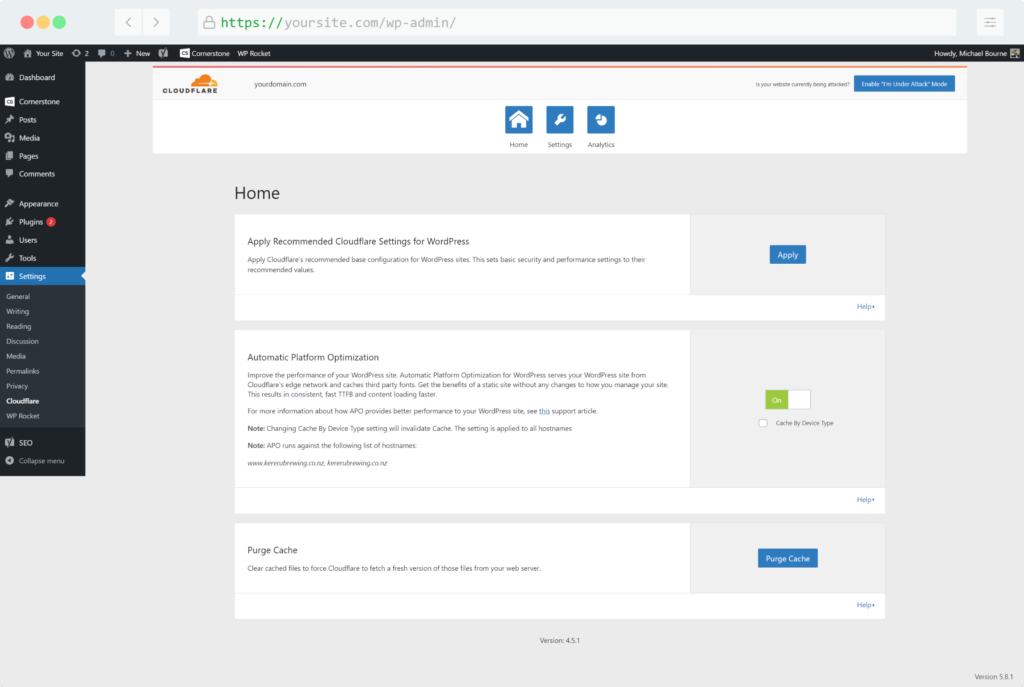
That’s all we need to do on WordPress specifically, let’s head back to Cloudflare to configure everything.
How to set up Cloudflare for optimal performance
While there are many ways to set up Cloudflare, these are my exact settings I use on all sites. Let’s go through it tab by tab.
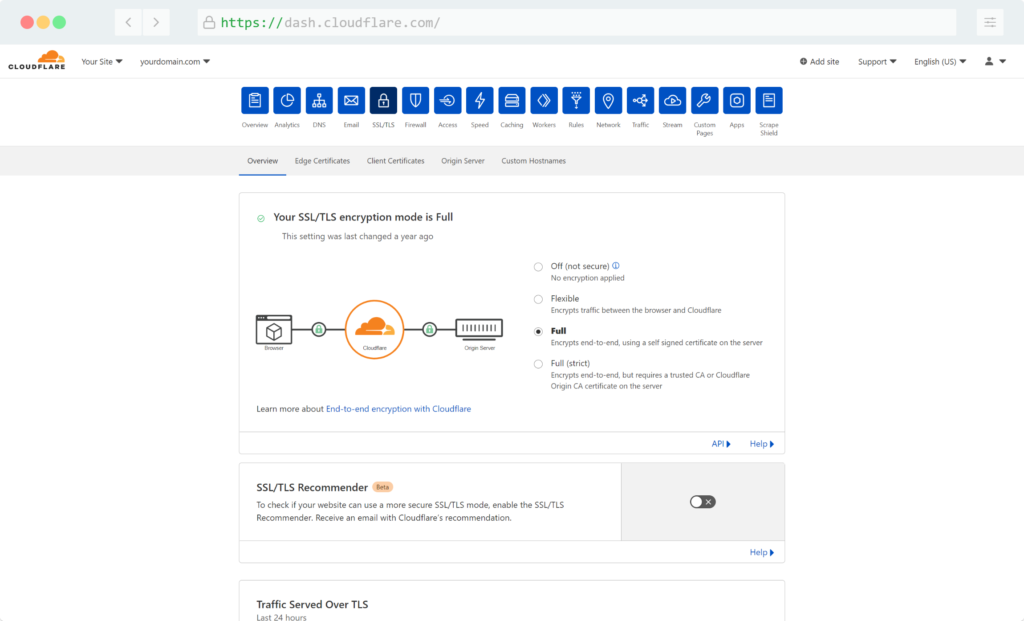
Under the SSL > Overview tab, ensure you are using Full or Full (Strict) mode. If you have generated an SSL certificate such as LetsEncrypt, or purchased a 3rd party paid SSL certificate for your server, you can safely select Strict mode. If your server has a self signed certificate, Full mode is for you. Flexible is not recommended for any website, as it connects to your origin server in unencrypted http.
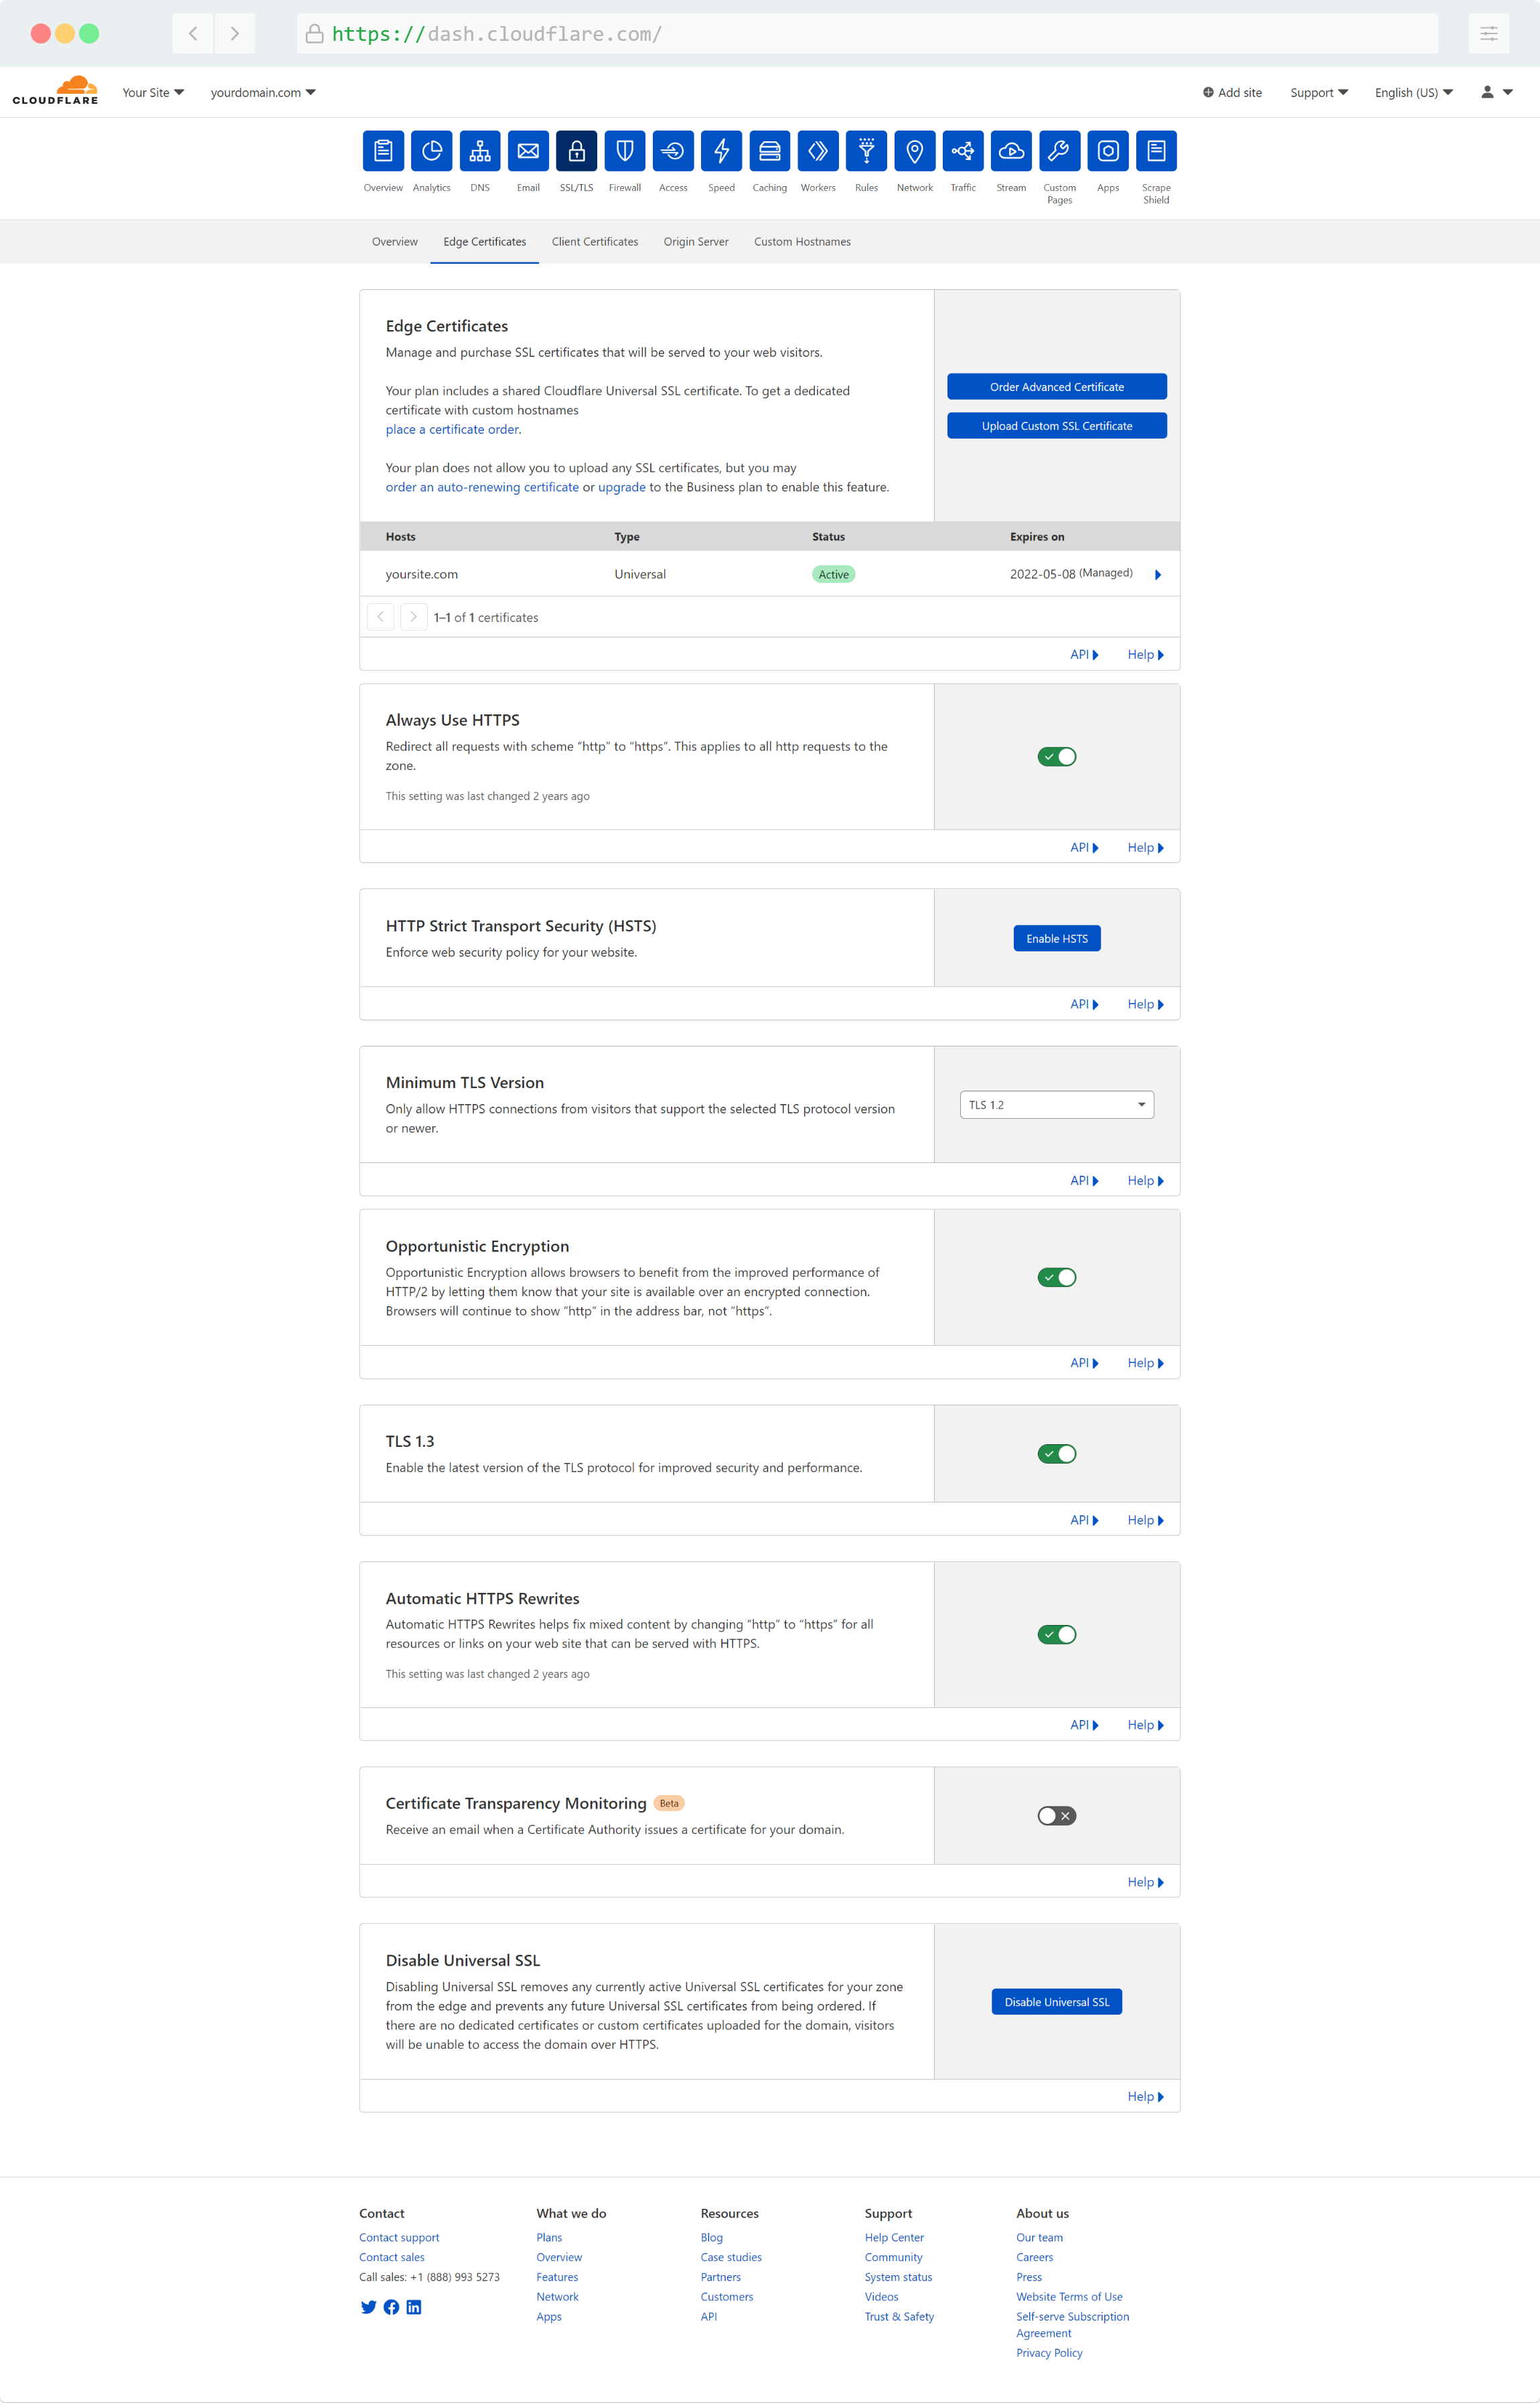
Next up, go to SSL > Edge Certificates tab, and follow these settings:
- “Always Use HTTPS” should be enabled.
- “Minimum TLS Version” should be set to 1.2.
- “Opportunistic Encryption” should be enabled.
- “TLS 1.3” should be enabled.
- “Automatic HTTPS Rewrites” should be enabled.
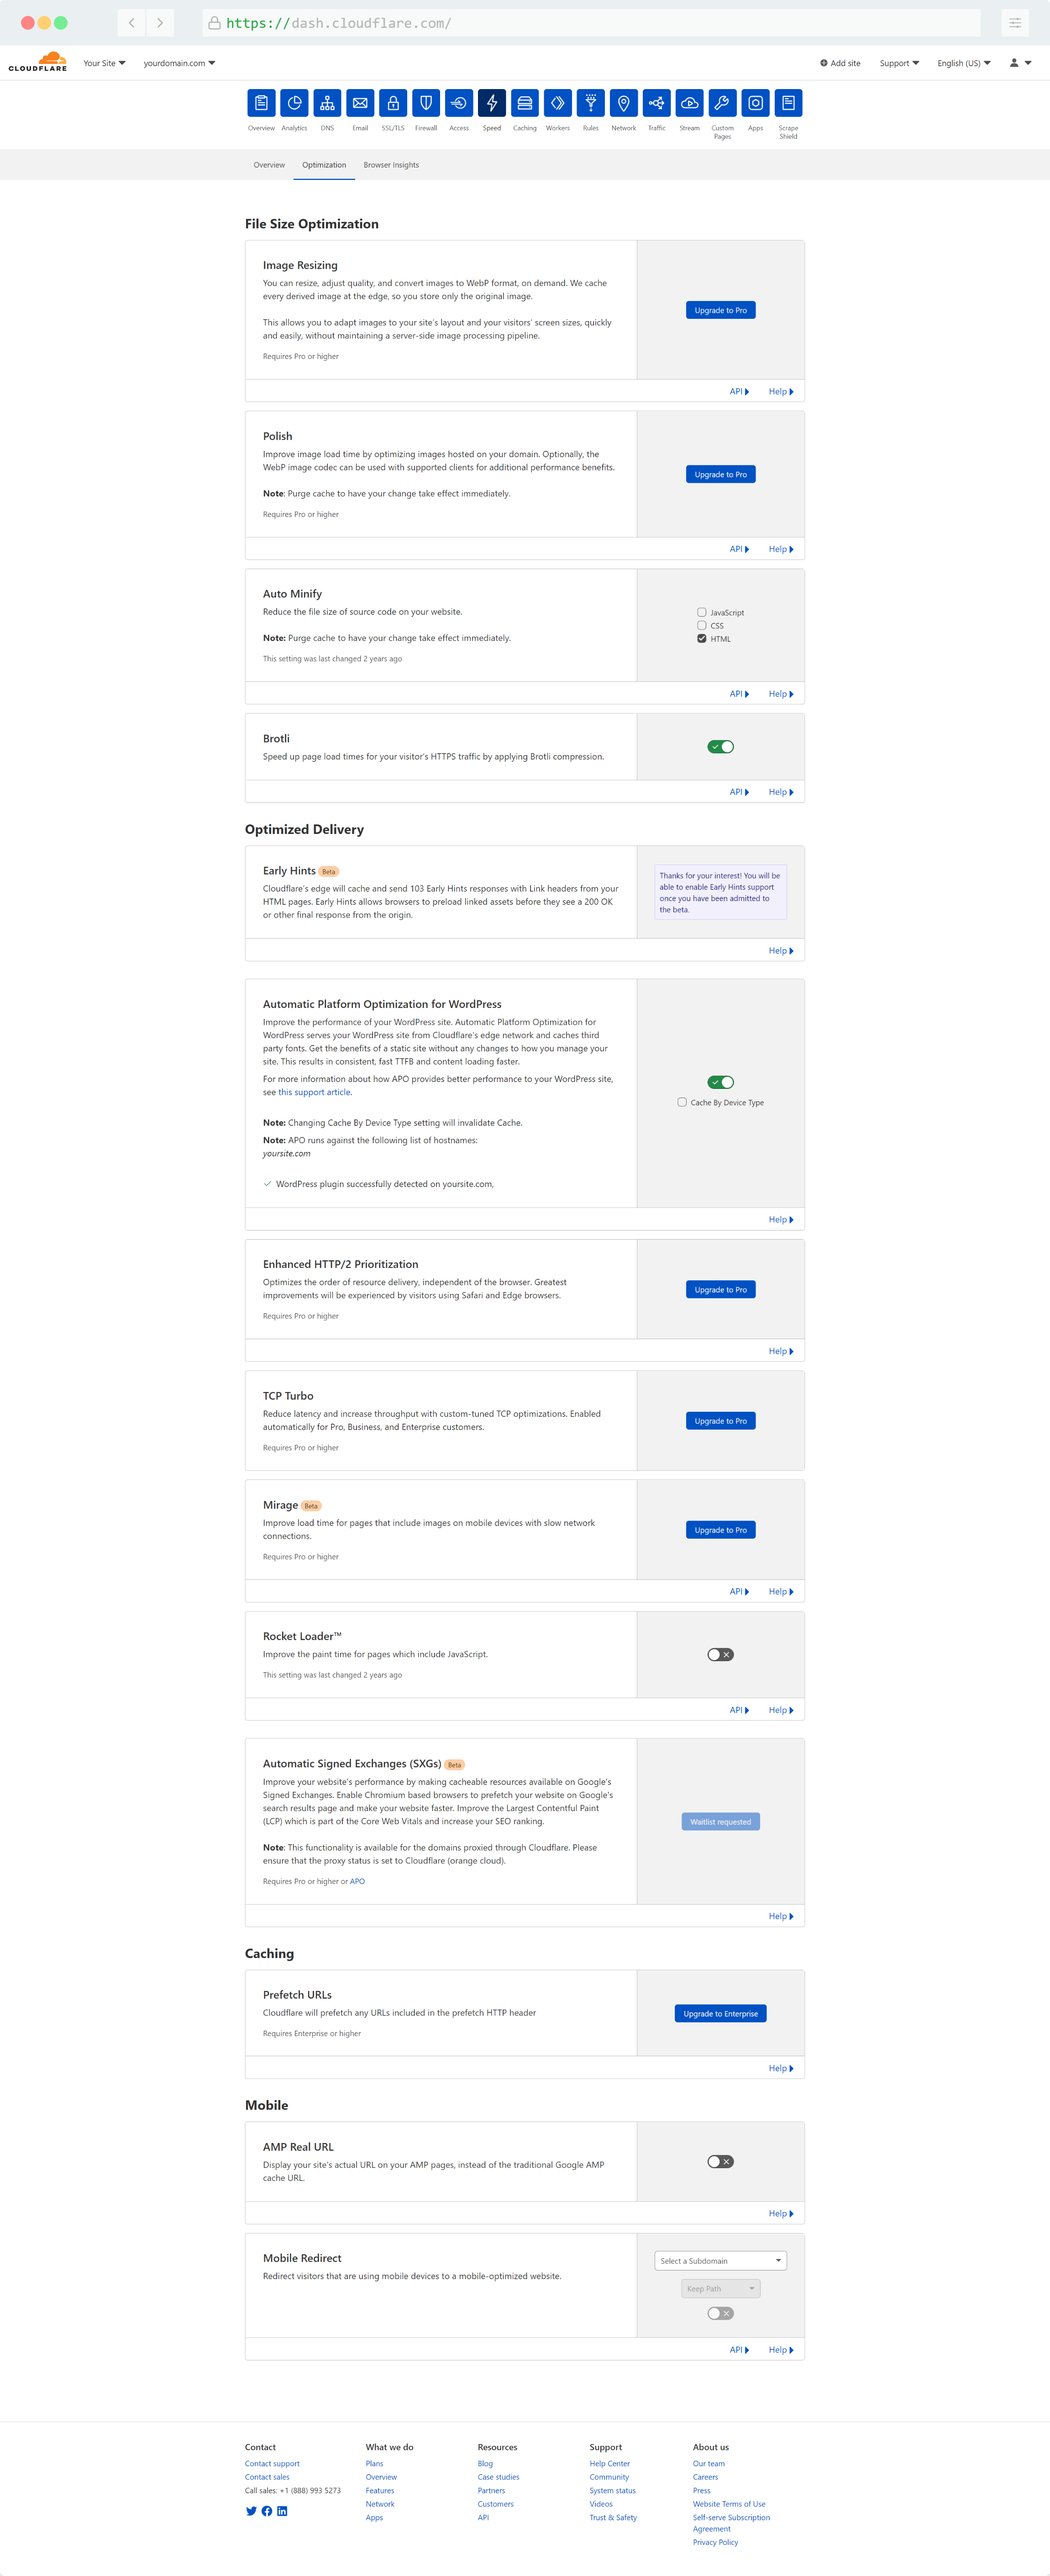
The next tab is for Speed settings. There is a lot here, but we only use a few things.
- “Auto Minify” should only be applied to HTML for most themes and plugins. It might work with others, but in general, I recommend not using it.
- “Brotli” should be enabled.
- “Automatic Platform Optimization for WordPress” should be enabled. This feature costs $5 per month, but it’s well worth it. More on that later in the guide.
You might see sections for “Early Hints” and “Automatic Signed Exchanges” with links to join a beta or waitlist. Go ahead and click those links, when these features launch you will want to use them.
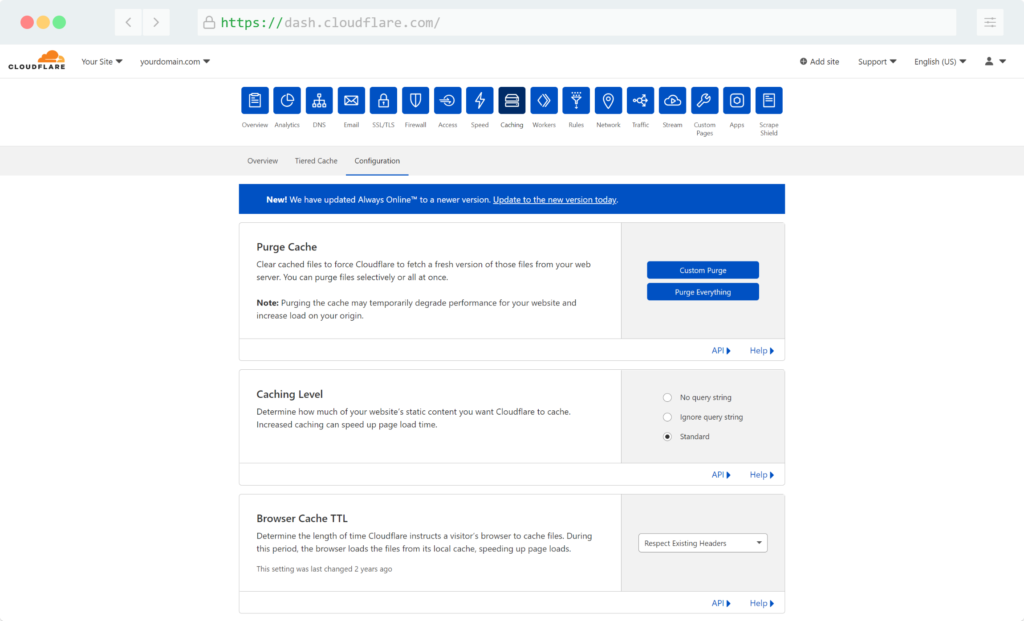
Head over to the next tab, which is Caching. Under Configuration, set the cache level to “standard” and the TTL to “respect existing headers“.
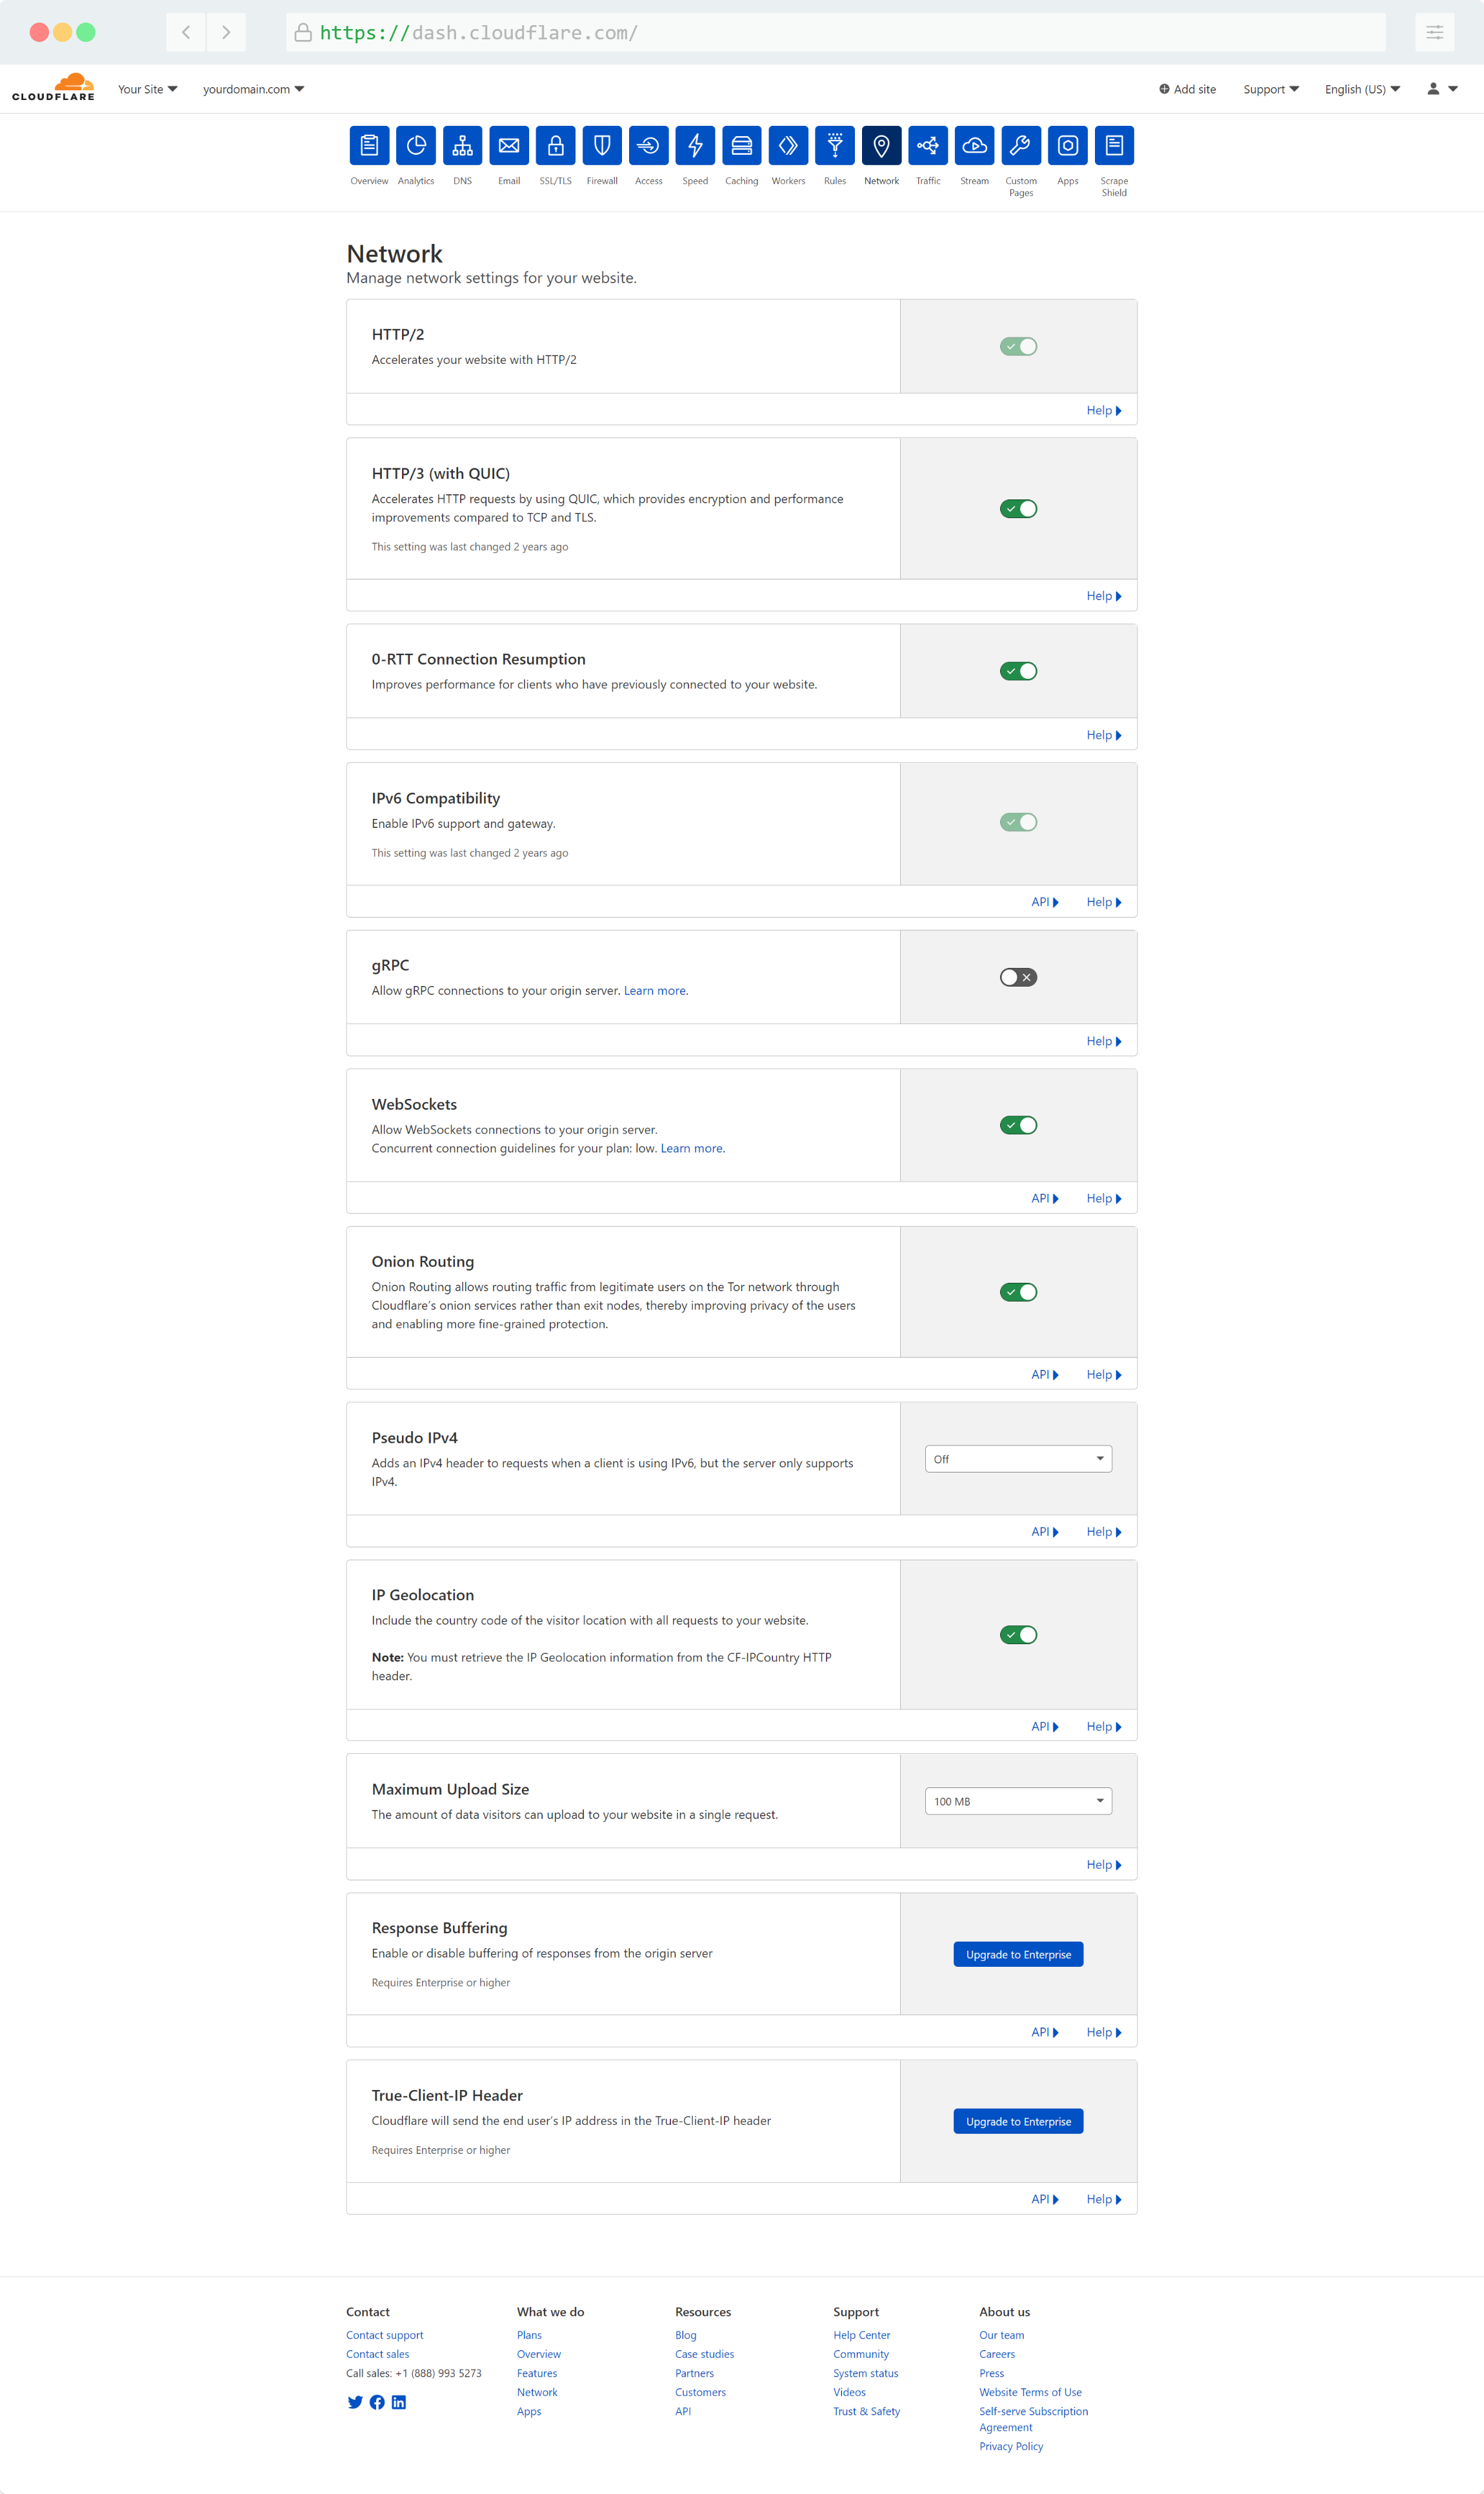
Up next is the Network tab in Cloudflare. This page has a lot of options, so let’s run through them quickly:
- “HTTP/2” should be enabled (and is likely forced enabled at this point.
- “HTTP/3” should be enabled.
- “0-RTT” should be enabled. (note: this has minor security implications if you’re running a generally insecure setup like a home brewed ecommerce payment module, which you shouldn’t be anyways. Disable this if you’re concerned).
- “IPv6” should be enabled.
- “IP GeoLocation” should be enabled.
Every other setting on this tab is optional and dependent on your specific needs, but generally cone be left untouched.
Cloudflare Page Rules for WordPress
There are 2 critical page Rules that every WordPress site should be running. These protect against login botnet attacks and help prevent backend interference with cached scripts.
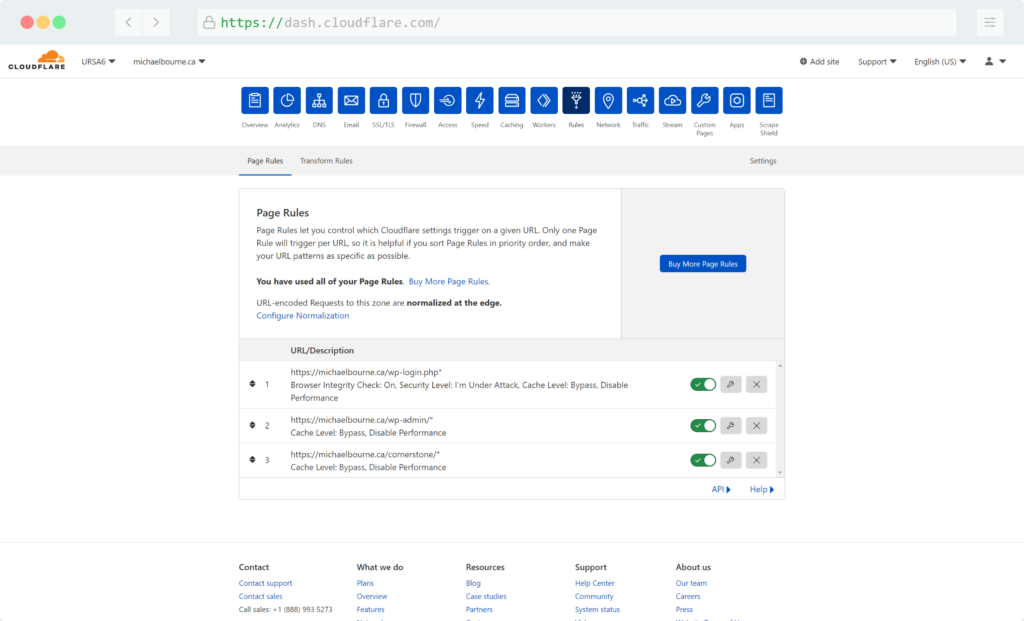
The first rule protects your login page from bots. This one rule can eliminate nearly all of your fraudulent login attempts. No need for a bulky security plugin to try to handle this with PHP when it can be stopped on a DNS level.
The first rule should be applied to /wp-login.php* with the settings “I’m Under Attack” on security level, “Bypass” on Cache Level, “Disable Performance“, and “Browser Integrity Check: On“.
The second rule should be applied to /wp-admin/* with the settings “Bypass” on Cache Level, and “Disable Performance“.
The third rule pictured here is for the “Pro Theme” page builder, but it is similar to all page builders. You should always have a cache and performance exclusion rule for the URL prefix your builder uses to edit pages.
Automatic Platform Optimization for WordPress
Earlier I told you to enable this, but let’s talk about why. First, what is APO? This is directly form Cloudflare:
Improve the performance of your WordPress site. Automatic Platform Optimization for WordPress serves your WordPress site from Cloudflare’s edge network and caches third party fonts. Get the benefits of a static site without any changes to how you manage your site. This results in consistent, fast TTFB and content loading faster.
Cloudflare
Think of it like caching. You’re familiar with plugins like WP-Rocket already, right? These WordPress plugins save an HTML version of a fully rendered page on your server, and then send that data to a user instead of forcing WordPress to render the same page over and over again.
But that has some sever limitations. It’s still your server sending the cached page to a user. Often still using PHP to do the routing so it can work with plugins like Woocommerce. This is much faster than not having a cache, but what if it was better?
Enter APO. APO will cache your page in a similar fashion, but it will save a copy of that cache on its edge network. That means your site is saved as HTML on nearly 300 servers around the world, and the closest server to your visitor will deliver it. Your server doesn’t even get hit.
This is by far the best TTFB improvement you can make on WordPress.
Will this help if your page has 50MB of images? Not as much, you still need to ensure you build performant sites. Content performance matters just as much as server performance. But this makes the server performance aspect much easier.
One caveat I hear is for dynamic websites. Ecommerce. LMS. membership. When people need dynamic sessions and can’t rely on a cache. APO will still help you, because not all of your sessions are dynamic. And when a user does login, Cloudflare has one more feature you can enable to improve server routing and round trip time: Argo. Argo was built for sites like that, and I highly recommend it.
Using APO with other caching plugins
You can stack them, although I don’t always recommend it. WP-Rocket has a specific helper plugin to disable caching but keep the other optimizations enabled, and I think that’s a good place to start. Content optimization done by these plugins can still be massively helpful, Lazy loading images and videos, delaying scripts and styles, all things Cloudflare doesn’t do well (yet).
And that’s it. Go forth, enjoy your new fast website.